The roof protects your home or building from moisture, which can lead to mold and mildew inside, rotting wood, higher heating and cooling bills, and lower resale value. Regular maintenance and periodic repair are the best ways to keep your roof healthy. Contact Columbus Roof Repair for professional help.
Start with an outside examination, looking for leaks, water stains, moss, sagging or discolored shingles. Then inspect the flashing around vent pipes, dormers and chimneys.
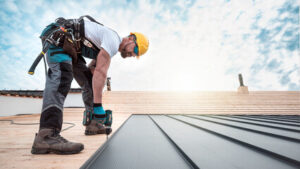
Shingles are constantly exposed to sunlight and weather, so it’s no surprise that they will degrade over time. Fortunately, shingles are fairly easy to replace when they become damaged.
Some signs of shingle damage include leaks in your ceiling, dark spots on the roof, and a musty odor. If you notice any of these signs, you should have your shingles inspected and repaired.
The first step in replacing a shingle is to remove any overlapping shingles from the row above the damaged one. This prevents you from damaging the underlying shingles when you pry up the old shingle. Using a flat pry bar, loosen the nails that hold the shingles in place. When you’re done, put the shingles aside and make sure to pick up any stray nails and debris from the work area.
Once you have the surrounding shingles removed, it’s time to begin the repair process. Begin by loosening the shingles and nail heads with your pry bar, starting with the shingle that’s immediately above the damaged shingle. Slide the pry bar under the shingle, and pull up at a 45-degree angle. Repeat this step on the shingles in the row above and below the damaged shingle. Once the shingles are loosened, you’ll be able to pull them up and discard them.
You’ll also want to inspect the shingles in the repair area for cracks and loose areas. If you find any, apply roofing cement to these areas to keep them secure.
After you’ve inspected the damaged shingles, you can begin replacing them. Start by placing a new shingle over the existing one, and nail it into place with roofing nails. Apply a dab of shingle cement underneath the tabs to help seal them to the roof.
After you’ve replaced the damaged shingles, you should re-caulk any gaps with caulking compound to prevent moisture from getting into your home. Also, re-caulk any ridge vents you have to ensure they are properly sealed and watertight. If your shingles are severely damaged or have reached the end of their lifespan, a complete roof replacement may be necessary. Contact Presidio Roofing to learn more about the different options available for your home.
Leaking Gutters
Gutters are the simplest part of your roof’s waterproofing system, but they play a crucial role. They collect roof water and direct it away from your house, preventing damage to the walls, foundation and landscaping. If you have leaking gutters, it’s important to find the source of the leak and fix it right away to prevent further, more expensive damage.
Leaking gutters often appear around the corner seams where each section of the gutter connects to the downpipe. This happens because the sealant between each piece of gutter has degraded over time, and it’s important to replace it before it’s too late. Ideally, you can use caulking or waterproof tape to make your repair.
Metal gutters can also leak at the corners, and this is usually caused by the expansion and contraction of metal as it responds to temperature changes. This can cause the corners to pull away from the fascia board, causing a gap where water can seep in.
Water leaking from gutters may also indicate that the water isn’t draining properly. This can lead to wood rot, which is very serious and may require costly repairs or replacements. It can also lead to water stains on the side of your home, and it can even cause soil erosion and hydrostatic pressure pushing against foundation walls.
One of the most common ways to prevent this is by using gutter aprons. These are L-shaped lengths of metal that attach to the edge of your roof under the shingles and angle down over the inner edge of the gutter, eliminating the gap between the wall and the gutter and channeling rainwater directly into it. They are available at most home improvement centers and cost less than $10 per section.
If you’re not comfortable making this type of repair, or if the leaking is due to a more serious problem with your gutters, it’s best to hire a professional to handle it. They’ll be able to check the entire gutter system and make any necessary repairs. They can also install new downpipes and gutter corners, and will ensure that they’re fastened securely to the fascia boards of your roof.
Debris on Your Roof
Debris on your roof isn’t just an unsightly mess, it can also cause major damage. Natural debris such as branches, leaves and pine needles can scrape or scratch the surface of shingles and cause other serious problems. In addition, these items can clog gutters and allow water to overflow onto siding, potentially damaging the wood. Leaving this debris on your roof can also conceal damaged areas and lead to bigger issues down the road, so it’s important to clean it regularly.
In addition to natural debris, man-made objects can also fly off and land on your roof. This includes everything from antennas, shutters and fencing to lawn chairs and bits of masonry. These items can be very damaging to the shingles and can punch holes in them, especially during high winds or serious weather events.
It’s essential to regularly trim nearby trees and clean your gutters to prevent these types of debris from landing on your roof. If you’re uncomfortable doing this yourself, a professional roofing contractor can take care of it for you.
Light debris is typically easy to remove on your own, as long as you’re comfortable with being up on a ladder. Be sure to wear slip-resistant shoes and have someone else hold the ladder for safety. Heavy debris can be more difficult to clear off your roof and may require the use of specialized equipment.
If you have a leaky base flashing, your residential roofing contractor will need to remove shingles and the surrounding area around the affected section of the metal pipe collar to assess the extent of the problem. They will also need to remove cedar, Hardi-Plank or vinyl siding if it’s in place to access the flashing. This is a more involved process and can be expensive, but it’s necessary to get the leak fixed properly. Once the damaged shingles and flashing are removed, the roofing professional can perform the necessary repairs. For example, if the metal pipe collar has been bent or cut by the shingle, it will need to be straightened. The roofer will also inspect the metal flashing for any signs of rust or corrosion, and repair them as needed.
Weather
The Chicagoland area sees 23 days of severe weather on average every year, with gusty wind, rain and hail. Any of these can damage your roof. And if your roof is damaged, everything in your home is at risk.
The first thing to do is assess the damage to your roof, from the ground and from inside your house. Get up in the attic, crawl space or wherever you have access to look around. Look for dripping water, damp stains and pooled water on the ceiling, walls, floor or wood beams. Look also for signs of sagging or cracking.
Next, make sure you have the proper roofing repair tools, a ladder and any other supplies you need to do the job well. A good basic set includes a pry bar for removing and leveraging sheathing, flashing and shingles; shears for neatly cutting shingles; a cat’s paw nail puller (the preferred tool of most roofers); and caulking gun or putty knife to apply roofing cement to cracks and holes. If you find holes that are larger than a cat’s paw, or extreme physical damage to your roof that is beyond what you can reasonably do on your own, it’s time for a professional.